We refer to depth of field as the capacity to make one of the planes within in the depth of the photograph more in focus than the rest of the planes. This technique allows us make the subject stand out from the rest of the photograph to whatever degree we desire.
It’s strongly recommended to control the depth of field when you shoot the photo because even with photo editing programs which can manipulate it, the result will be inferior and artificial. In the manual for your camera (yes, those pieces of paper that came with you camera when you took it out of the box), and also in books and on the internet, there’s a ton of information about how to master this technique. So here we’ll just make a passing reference to how it can be used.
Creating less depth of field, namely making the background out of focus compared to the subject, allows the subject to really pop. It can create very interesting empty spaces that let the photo breathe. Effectively applying rules we’ve already seen in this tutorial like Less Is More or the Rule of the Gaze can achieve this effect. At the same time we achieve simple and clean compositions.
On the other hand, we can decide to use a greater depth of field so that in addition to the central theme of the photo, the rest of the components appear in focus. In such case we will have a more complex and difficult composition because a lot more components will appear in the photograph, compelling the viewer to take in more information. As a result, using a greater depth of field requires us to closely manage all the components that appear in the photo.
It’s also important to keep in mind that a lot of factors are involved in controlling depth of field, like focal length, the aperture of the diaphragm, the distance of the subject, etc. Sometimes it’s not possible to achieve the desired effect because we don’t have all the right conditions that we need. Consequently, to use this technique we have to be very familiar with our equipment and the conditions (for example light) in which we are taking the photograph.
A good example of photos with a shallow depth of field is wildlife photos. Picture an animal from the jungle sharply in focus but with the background so out of focus that you can only make out the colors. The photographer manages to paint a portrait of only the animal, although it’s true that the large distance that separates the animal from the photographer in the shot helps achieve this effect (because of Focal Length). As mentioned above, the conditions of where and how the photo is taken can help a lot.
Let’s consider the opposite situation. Photographs taken with a wide-angle lens, which has a very short focal length, increase the depth of field. This type of lens is used a lot for landscapes and street photography, causing everything to be well defined. This helps us make the whole scene where the subject is photographed to stand out very clearly.
Example 1 Shallow Depth of Field
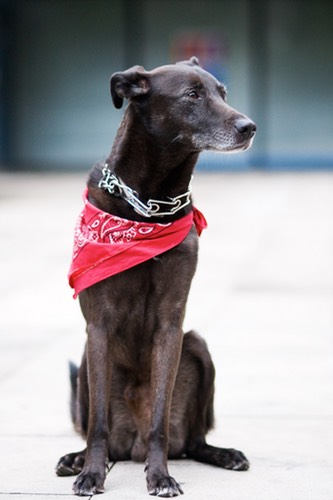
"Gos", Barcelona (2008)
Walking around with friends, we came upon this dog next to Santa Ana Church in Barcelona. The photograph became a portrait of the dog, so we can ignore the rest of the elements like what could be windows and a poster in the background. We help ourselves using depth of field, adjusting it so that only the dog comes out in focus.
Example 1 Greater Depth of Field
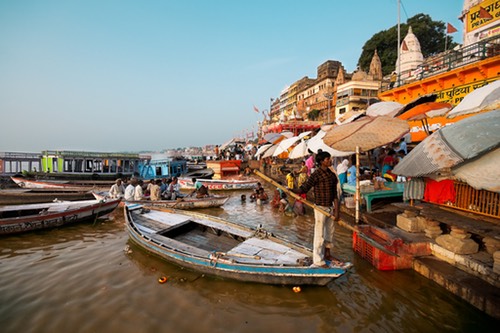
"Els colors del Prayag Ghat", Varanasi (2008)
Varanasi, India 2009. In the morning there is big hubbub on the Ganges River; there are people bathing, taking boats to the opposite shore, traders. In this photo I wanted this boy in his boat, who I found interesting, to appear amongst all the activity. To do this I chose to apply a greater depth of field so that all the components would come out in focus.